
Dragon Warrior Guide

Evil plagues the realm of Alefgard. As the descendent of the legendary hero Erdrick, King Lorik in the Kingdom of Tantegel has called for an audience. Erdrick had used a powerful artifact called the Ball of Light to banish the monsters and restore peace to the world. They have since been stolen by the Dragonlord and hidden in darkness. Monsters have once again appeared, threatening towns and once beautiful forests and rivers have been twisted into wastelands and poisonous marshes.
Across the channel, the ominous Dragonlord's Keep casts a dark shadow over the land. Only by recovering the Ball of Light and defeating the Dragonlord will peace once again be restored. To make matters worse, Princess Gwaelin has also been abducted and there is no clue to where the Dragonlord has taken her.
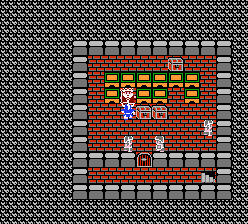
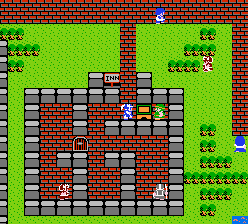
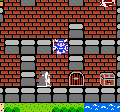
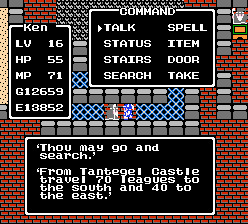
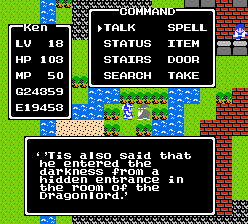
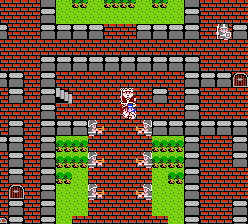
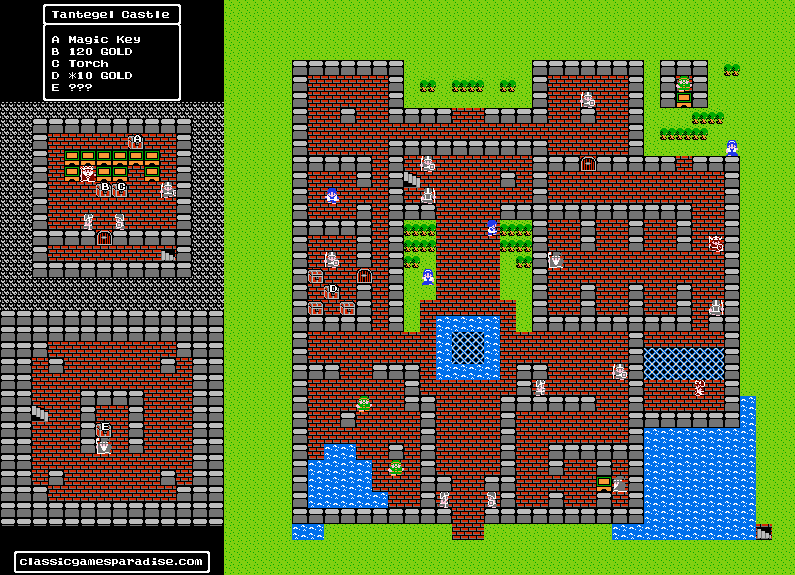
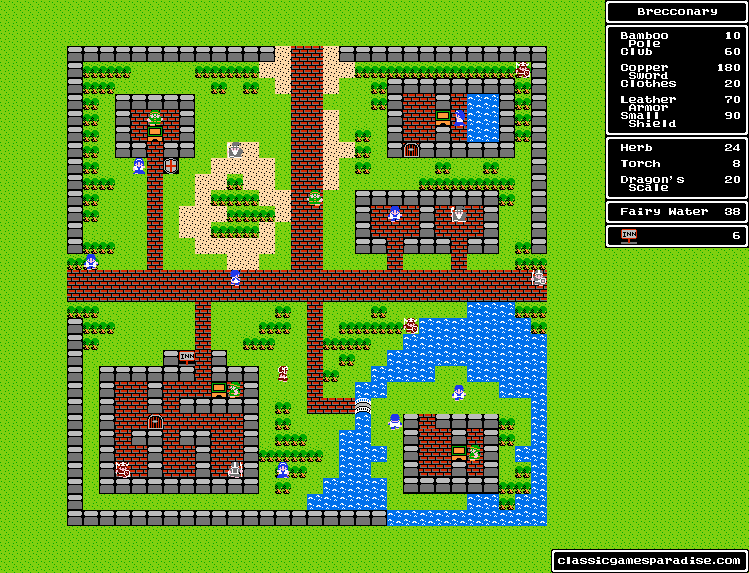
King Lorik has prepared treasures to aid in your journey so use the Magic Key to unlock the throne room. Speaking to the people around Tantegel Castle only confirms King Lorik's grim words. Your first destination should be the nearby town of Brecconary.
HP: 3 HP: 4 HP: 6 HP: 7 Exp: 1 Exp: 1 Exp: 2 Exp: 3 GP: 1 GP: 2 GP: 2 GP: 3-4 Shops in towns will sell new weapons and armor to better combat the monsters plaguing the land. When you gain new equipment, your previous item will be sold back to the merchant for half its value. A warrior's equipment is not cheap so you will have to prioritize what you want to use. A Copper Sword is just out of your reach so the Bamboo Pole or Club will have to suffice until then. Club/Clothes or Pole/Leather Armor are good pairs. Though not a traditional armor, the Dragon Scale at the Tool Shop will provide a defensive bonus when donned in your inventory.
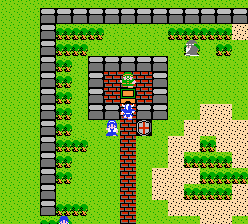
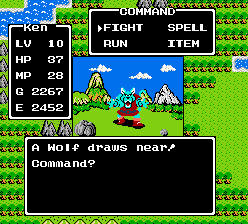
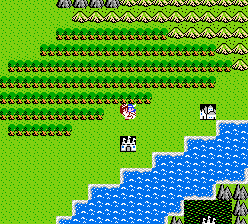
To survive the more powerful monsters, you will need to get stronger. Fight slimes around Brecconary and Tantegel Castle but don't venture too far just yet - you're not equipped to survive what lurks in the more remote regions of Alefgard. When you are hurt, return to the inn at Brecconary to heal your HP. It is always better to err on the side of caution - when you are defeated in battle you will awaken in the throne room with half of your current gold removed. Forests and hills have more encounters with enemies than on the plains, especially those to the southwest of Tantegel Castle. Just don't venture too far into the hills - powerful monsters dwell in the southernmost area.
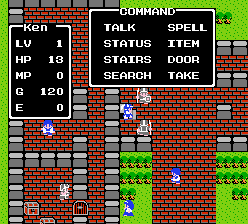
When you have attained level 3, you will learn the healing spell. Visiting the sage in Tantegel Castle will restore your MP for free, allowing you to heal with magic instead of having to spend gold at an inn. As Erdrick's descendant, your magic ability will grow powerful enough to overcome foes just as easily as with any blade. Bear in mind that stopping damage is much more effective than using high MP spells to heal - use spells like Sleep and Stopspell to great effect to completely shut down monsters at the beginning of battle.
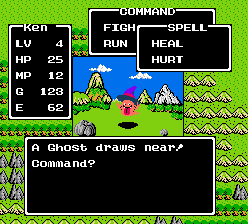
At level 4 you learn the Hurt spell. You can use it to devastating effect against the Ghosts above the mountain range to the north, simply returning to Tantegel's sage when your MP runs out. Fighting Ghosts, you should be able to afford the Small Shield from Brecconary in no time. Take care not to venture too far by crossing the second bridge to the east - much stronger monsters dwell there and will likely overwhelm you.
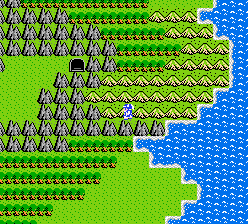
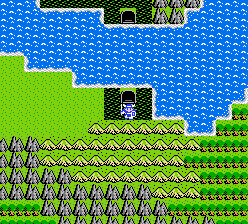
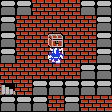
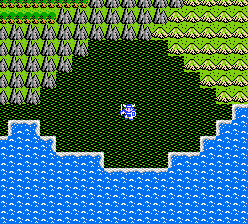
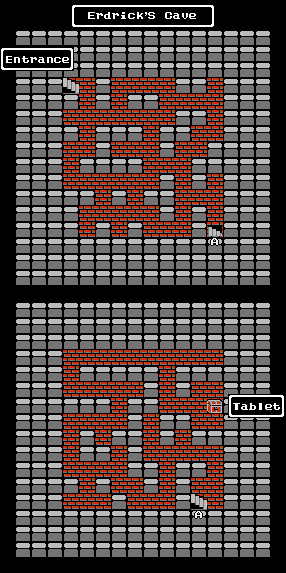
When you are strong enough, you can explore Erdrick's Cave to the northwest of Tantegel Castle. You will need to use a torch to find your way - and remember, they do eventually burn out so carry a spare or you will have to feel your way around in the darkness. The lowest level contains a chest with a tablet written by Erdrick. It describes the three items you will need to reach the Isle of Dragons, entrusted to three worthy keepers.
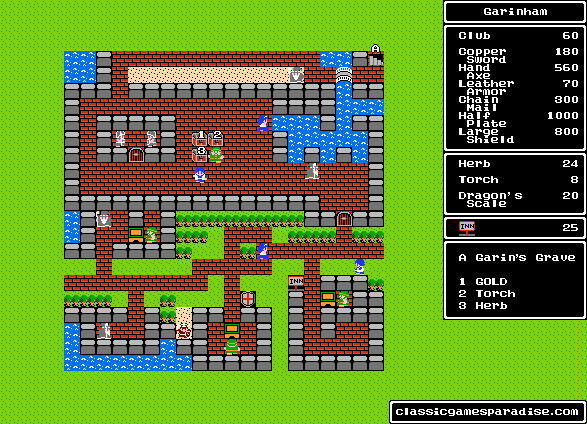
HP: 13 HP: 15 HP: 20 Exp: 4 Exp: 5 Exp: 6 GP: 9-11 GP: 9-12 GP: 12-15 If you are feeling brave, you should be strong enough to visit Garinham to the northwest at around level 5. Speaking to the villagers, you can hear rumors that Princes Gwaelin is being held in a cave somewhere in the east. You will likely be unable to afford the expensive equipment at Garinham just yet but don't take your eye off the prize that is the Copper Sword. With the large building to the north locked, there isn't much to do beyond continuing your journey.
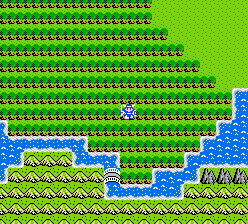
If you have explored around the mountain range north of Tantegel Castle, you have likely had your first encounter with a swamp. These inhospitable areas are not only host to vicious monsters but are also filled with poisonous gas that will cause you to lose HP with every step. Take care to avoid traveling over them when possible and be sure to keep an eye on your health. When you do eventually travel east you will be forced to journey through a dangerous swampland so keep a supply of Herbs on hand to recover afterwards.
You can fight the Magicians around Garinham with Hurt but don't be surprised when they hurl their own right back at you. They are dangerous enemies but their whopping 10 gold each is hard to pass up. Be sure not to venture too far south - beyond the bridge Skeletons and much stronger lie in wait.
Once you can afford the Copper Sword and are around level 7, it's time to exploit one of the best known secrets in Alefgard - the Scorpion Nest. Seemingly insignificant, this southmost area of hills southeast of Tantegel Castle allows you to fight deadly Scorpions with just a quick journey back to visit the Sage to restore your MP. Make quick work of their high defenses with Hurt and finish them off with your sword if necessary. Alternatively, you can cast Sleep at the beginning of the battle for only 2MP and often defeat them before they awaken. The Chain Mail from Garinham will drastically increase your survivability against Scorpions.
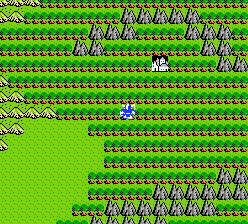
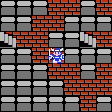
On the other side of the mountain range west of Tantegel Castle lies the Rock Mountain Cave. Powerful undead monsters have now made it their home, defending the treasures many explorers have attempted to obtain. Like Erdrick's Tomb, you will need to use torches to find your way - running out of them further down will mean certain death. At level 9 you learn the Radiant spell, allowing you to illuminate dark areas without having to use torches.
HP: 30 HP: 22 HP: 23 HP: 25 Exp: 11 Exp: 7 Exp: 8 Exp: 10 GP:
22-30GP:
12-15GP:
13-17GP:
18-24
HP: 20 HP: 30 Exp: 11 Exp: 13 GP:
15-20GP:
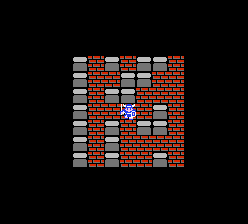
27-35Mysteriously, new treasure can be found in the chests every time you enter Rock Mountain Cave, allowing you to repeatedly plunder them. An Herb can always be found in a chest on the first floor next to the stairs leading down, giving you a chance to recover before facing the more dangerous denizens of the lower area.
The Large Shield from Garinham will help protect you against the devastating physical attacks from the Skeletons found on the second floor. Warlocks are the real danger here and will cast Sleep on you, possibly even defeating you before you can recover. You can also find a Fighter's Ring, which is rumored to increase your combat ability when worn from your inventory. Your real goal in Rock Mountain Cave is the chest on the bottom left side of the second floor. Within you will always find a large sum of over 100 gold that will re-appear every time you return from outside - a great way to raise funds for the more expensive equipment you will need for your journey to the east.
The chest on the lower left side of the second floor usually contains a large sum of gold but it can also reward the extremely rare Death Necklace. If you find the Death Necklace, do not equip it as it is a cursed item. Return it to town and sell it for an incredible 1200 gold. If it is worn, it can be removed by the wise old man in Brecconary but it will be destroyed in the process.
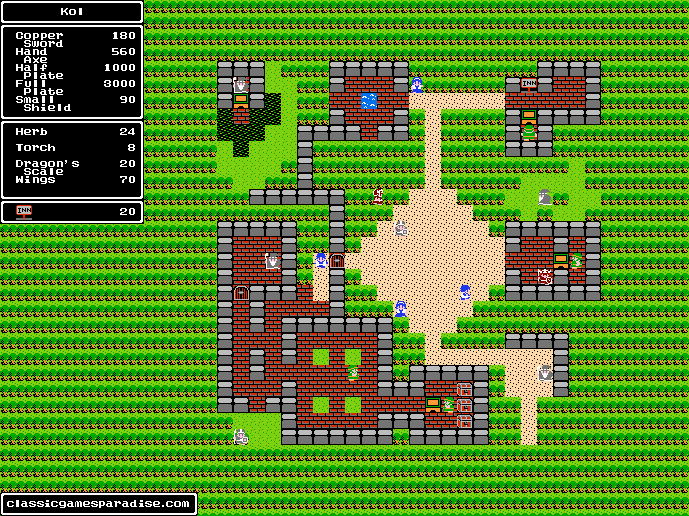
When you are done raiding the Rock Mountain Cave around level 10, you will be strong enough to travel to Kol over the two bridges far east of Tantegel. Wyvern's Wings from the Tool Shop allow you to return to Tantegel immediately when used, allowing you to save and recover.If you can afford it, the Full Plate is an excellent upgrade. At a mere 20 gold per night, the inn in this quiet forest village is a great resting stop if you wish to further hone your abilities in the surrounding area.
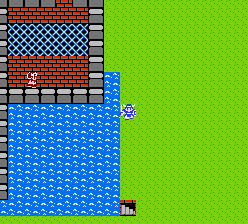
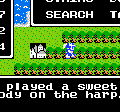
West of Kol through a narrow forested path lies a hidden cave. Within, an old man requires a test of courage of you: bring him the Silver Harp that holds power over the Dragonlord's monsters and in return he will reward you with the Staff of Rain.
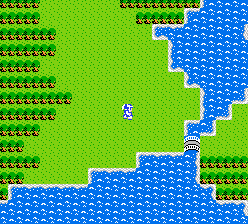
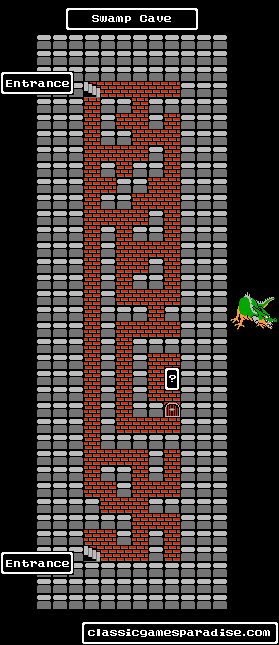
The Swamp Cave to the south is shrouded in darkness so be prepared with a torch or a Radiant spell. The monsters are no stronger than in the upper levels of the Rocky Mountain Cave so you should have no trouble making your way straight south to exit leading to the other side of the channel.
If you dare to explore the eastern chamber use caution - a fearsome Green Dragon has made its lair there. Green Dragons are among the strongest monsters in Alefgard and your first encounter will likely be a fatal one. Without the proper experience and equipment, the best you will be able to do is run away. With more strength and a better blade, the beast will be sure to fall. For now, it is much better to continue through the Swamp Cave into the southern island.
South of the Swamp Cave and below the crescent mountain range, you will find the remote village of Rimuldar. Powerful new monsters like Wolfmen and Wyverns inhabit these lands.
HP: 22 HP: 34 Exp: 14 Exp: 16 GP: 30-40 GP: 35-50 New equipment awaits you at the weapon shop. Sharp enough to cut even a dragon's scale, the Broad Sword will serve you well in this region. The Full Plate is an essential upgrade with more than double the defense of the Chain Mail. The Magic Armor will slowly heal you with every step but will likely be out of your price range for now.
The villagers of Rimuldar will bestow a wealth of information about important items you may have missed or may now have access to with the Magic Keys. Some of these locations have already been visited but many still lie ahead. Be sure to talk to everyone before you continue on your journey.
Rimuldar is the first place where you can buy Magic Keys. With them, you will finally be able to unlock the many doors you have had to pass by up until now. Take the secret path along the river north of town to visit the shopkeeper who will sell them for 53 gold each. Just like with Herbs, you can carry a maximum of six in your inventory.
The inn at Rimuldar is expensive at 55 gold per night but the monsters you will encounter reward enough to make up for it. You may find it best to hone your abilities in this area until you have both the Broadsword and Full Plate. With their combined power, you will be able to venture to the southern region of the island with confidence. You can fight the Goldmen to the south for the huge amount of gold they drop but if you aren't properly outfitted it isn't without risk so proceed at your own peril.
You can unlock the door at Rimuldar's inn with a Magic Key to talk to the old man inside. He will reveal that a magic item is hidden four steps south of the bath in Kol. If you return to Kol and search in the described location, you will unearth the Fairy Flute. Its purpose is a mystery for now but it will surely be of use in time.
Southern Cave
Stock up on Herbs before crossing the bridge and fighting in the southern area of the island - it's better to be prepared rather than risk losing half your gold. The monsters in this region rely on physical attacks so your new Full Plate armor will be worth its weight in gold.
HP: 50 HP: 36 HP: 38 HP: 42 Exp: 6 Exp: 17 Exp: 20 Exp: 24 GP:
150-200GP:
45-60GP:
60-80GP:
75-100You will find a pass through the southern portion of the mountain range leading to the Southern Cave. The wise man within requires a symbol of your lineage to Erdrick. With no way of proving your identity, he will magically warp you back outside. This southern region is a great place to gather both experience and gold so it would be wise to spend time here until at least level 12.
You may acquire what you feel is an excessive amount of gold from the monsters around the Southern Cave. You journey is next going to take you to the most dangerous part of Alefgard where even better (and much more expensive) equipment awaits. With the rumors from Rimuldar in mind, travel back to the mainland.
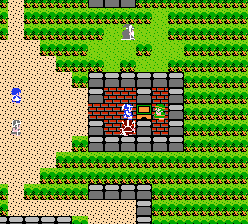
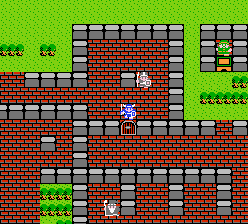
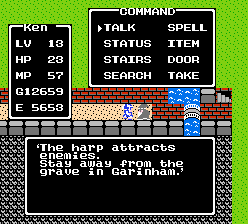
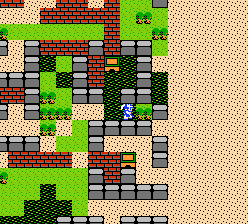
At Tantegel Castle, unlock the upper door with a Magic Key. Keep an eye on your HP as you cross the deadly barrier tiles and a soldier will give you a hint for finding the legendary grave of Garin in Garinham. You aren't done here yet - go around the outside castle wall to the north and down the side around the river to find the cellar. Within a wise man will reward you with the Stones of Sunlight.
As long as you have at least one key you will be able to restock them at the shopkeeper in Tantegel Castle, though at a higher cost than in Rimuldar.
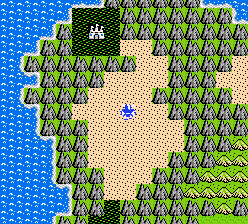
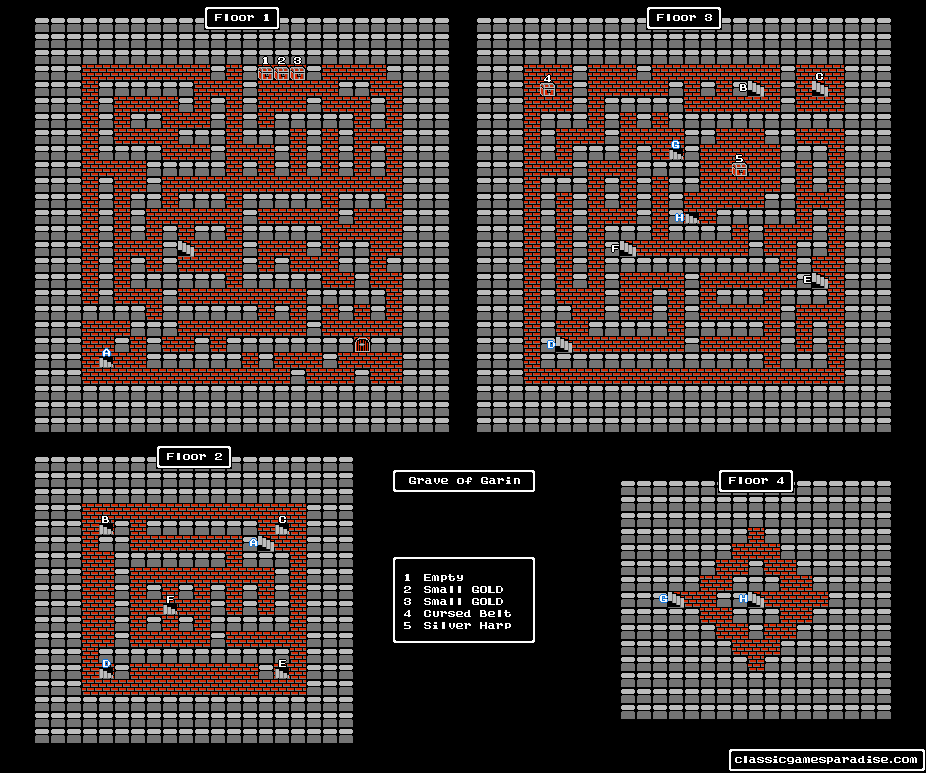
At Garinham, unlock the large building with a Magic Key. Remembering the soldier's words, push along the shadowed wall on the north side until you find a hidden passage. Follow the path along the building that will lead you straight to the Grave of Garin.
HP: 36 HP: 35 HP: 38 HP: 46 Exp: 18 Exp: 20 Exp: 22 Exp: 28 GP:
55-70GP:
75-85GP:
65-90GP:
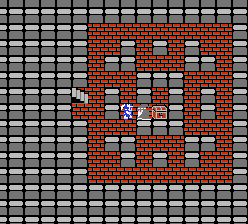
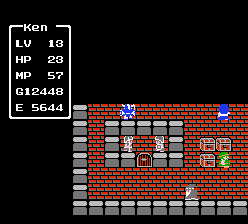
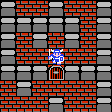
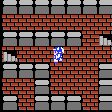
90-120The first floor of Garin's Grave only has one set of stairs leading down, locked behind a door to the south. A chamber to the north holds three chests that have unfortunately been looted over the years though a few gold coins may still be found, having been left behind in haste.
Monsters on the first two levels are weaker than those you faced near the Southern Cave but floors three and four are where the real terrors await. Wraith Knights are likely the strongest monsters you have encountered yet so be sure to keep your HP up after every battle and remember to cast Sleep against these stronger enemies.
On floor 2 there are many stairs leading down. The upper left stairs leads to the quickest path left to the Cursed Belt on floor 3. Just like if you found the Death Necklace at Rock Mountain Cave, do not equip this cursed item - sell it back to a Tool Shop for 180 gold. The stairs you really want to take on floor 2 are in the lower left corner of the room. Move along the wall up then right to find yet another set of stairs to enter the fourth floor, the lowest level. One last set of stairs around the corner leads you to your prize - a chest containing the Silver Harp.
The Silver Harp is the item requested of you from the wise man back in the Northern Cave west of Kol. It has more importance than simply acquiring the Staff of Rain. Drawing monsters to its melody, every time it is played you will suddenly be attacked. It may be wise to use this harp to rapidly fight monsters for gold and experience before handing it over.
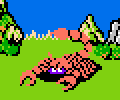
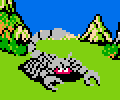
Green Dragon
After surviving Garin's Grave, you will certainly be strong enough to vanquish the Green Dragon in the Swamp Cave. An effective strategy is to cast Sleep at the beginning of battle - if it fails, run away to heal yourself and try again. Three to four strikes should make the beast fall. Explore further within to find none other than Princess Gwaelin! Return her to King Lorik at Tantegel Castle to be rewarded with the special item Gwaelin's Love.HP: 65 Exp: 45 GP:
120-160
Domdora Desert
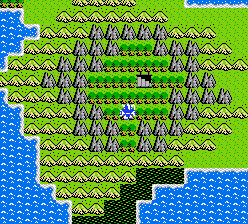
Your next destination will take you far south of Garinham over the bridge and into the Domdora Desert. You should be at least level 15 to have a fighting chance here. Many of the monsters found in the northern desert are similar in strength to those found back around the Southern Cave, making it an excellent place to acquire the needed experience.
HP: 35 HP: 55 HP: 50 HP: 4 Exp: 26 Exp: 33 Exp: 37 Exp: 115 GP:
90-110GP:
100-130GP:
110-150GP:
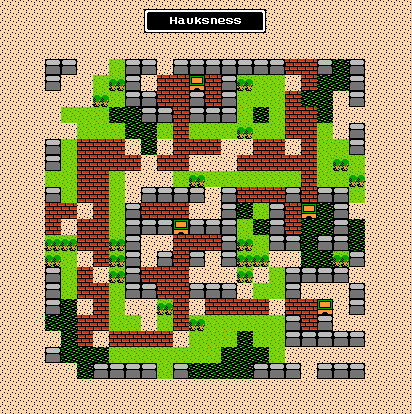
5Exploring the ruined town of Hauksness is tempting but powerful monsters have now made it their home. Instead, venture to the southern portion of the desert to encounter monsters that reward more experience than in the north. Demon Knights are even more vicious than Wraith Knights and seem unaffected by Sleep. Take care not to stray too far east or you will encounter the same deadly monsters that can be found within Hauksness.
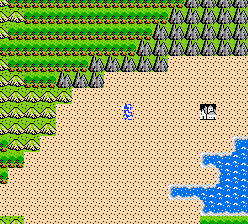
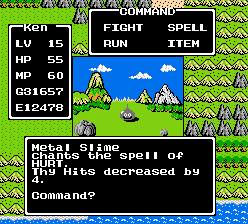
Far to the south near the coast you can find Metal Slimes. These skittish monsters are quick to run but can be defeated for a huge amount of experience. They are unaffected by magic so simply attack before they turn tail. The Magiwyvern here are a real menace with their frequent Sleep spell so strike first with your Stopspell.
The recent experience increases between levels has been rather extreme but rest assured from level 15 to 19 it remains a constant 3,000 per level. Once you have acquired new weapon and armor upgrades, it will go by in a flash.
Into the East
If you are brave enough, you can make a dash towards Cantlin in order to put all of your gold to good use by purchasing new equipment. This region is home to the strongest monsters in Alefgard that can be found outside of the Dragonlord's Castle. Even Green Dragons are commonly encountered around Cantlin.
HP: 58 HP: 60 HP: 65 HP: 65 Exp: 34 Exp: 40 Exp: 43 Exp: 50 GP:
115-140GP:
115-155GP:
120-160GP:
120-165The northern route may seem like the quickest way east but it leads you into a confusing canyon maze and then down into the deadly southern swamp. Choose to run from every encounter or these quick deadly monsters will make short work of you.
To reach Cantlin, travel down from Domdora Desert all the way to the coast. Cross the bridge east then follow along the mountain range northeast, passing by the first bridge you encounter. You will cross a bridge east surrounded by swampland that will bring you to Cantlin to the south.
Golem
You will be greeted at the gates of Cantlin by a fearsome Golem. Its powerful attacks are even greater than that of a Green Dragon but you have an item in your inventory to subdue the Golem. Play the Fairy Flute and it will fall into a deep sleep, allowing you to freely attack. If it awakens, simply play the flute once again. Once defeated, the way into Cantlin will be open.HP: 70 Exp: 5 GP:
10
The walled city of Cantlin is a town of merchants who have the best weapons and armor that money can buy. Unlock the shop to the east to buy the Flame Sword and Silver Shield. With these, you will be able to face even the monsters you may have been running from. If you have enough gold left, you may want to purchase the Magic Armor if you haven't already - it has the same defense as the Full Plate but it will slowly heal your HP with every step.
The villagers reveal hints of the whereabouts of Erdrick's Armor. It was last owned by an armorer named Wynn, who kept a shop in Hauksness before it was destroyed. Now that you are on more equal footing with the surrounding monsters, you can choose to fight monsters around Cantlin and use its inn to recover or you can retreat back to Domdora Desert to take advantage of the weaker monsters with the Magic Armor's regeneration.
At level 17 you learn a game changing spell: Healmore. Though it uses a tremendous amount of MP, it can recover more than most monsters are able to damage, unlike Herbs or your previous Heal spell. With it at your disposal you will be able to take anything the Dragonlord's minions will be able to dish out.
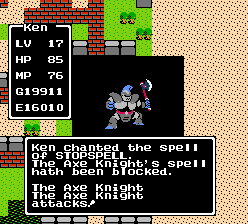
Axe Knight
Hidden along the back side of the village within the ruined armor shop, the Axe Knight awaits. He has incredible attack and defense and to make matters worse, he will frequently cast Sleep on you. Open the battle with Stopspell then slice away. If you have the Healmore spell, you should be able to recover almost all of your HP every time you use it.HP: 70 Exp: 54 GP:
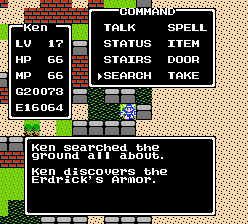
135-165When the Axe Knight is defeated, don't leave Hauksness just yet. Search the spot where you just fought and you will uncover Erdrick's legendary armor. This is the strongest armor in the land and it will not only recover your HP with every step but will also completely defend against poison from swamps and the damage from barrier floors.
In Cantlin, the old man in the locked house to the south has hidden himself away behind a passage of barrier tiles. Brave them with healing magic and speak to him to learn the location of a hidden treasure. Using Gwaelin's Love from your inventory while out in the overworld will reveal your location. The coordinates will lead you to the swamp south of Cantlin where you can unearth Erdrick's Token.
Now that you have the Stones of Sunlight, Staff of Rain and Erdrick's Token, return to the wise old man in the Southern Cave and he will reward you with the Rainbow Drop. Along the coast west of the southern Swamp Cave you will find a very narrow channel. When held towards the sky, the Rainbow Drop will create a bridge allowing you to travel to the land surrounding the Dragonlord's Castle. At long last you are able to challenge the evil plaguing Alefgard.
HP: 70 HP: 160 HP: 90 HP: 100 Exp: 60 Exp: 65 Exp: 70 Exp: 100 GP:
115-150GP:
110-140GP:
100-140GP:
130-140The Dragonlord's Castle awaits in the center of a dark poisonous swamp. Two locked doors lead to two sets of stairs leading down into the first level of the dungeon, both leading to dead ends. Remember the words of old man back in Rimuldar about a secret entrance - search directly behind the throne to reveal the true path down into the dungeon. You should be at least level 20 before venturing too deep but there is one item to reach first:
Hidden away deep within the Dragonlord's Castle is the most powerful blade in all of Alefgard - Erdrick's Sword. Without this legendary sword, you will have no hope of cutting though the Dragonlord's steel-like scales. To recover Erdrick's Sword, follow the highlighted blue path on the Map, then follow the highlighted green path leading back up to the chest on floor 2. With Erdrick's Sword even the mighty Green Dragon can be felled with only two strikes, making your climb to level 20 a brief one.
It should be no surprise that the Dragonlord has surrounded himself with the most powerful monsters in the realm. Even Erdrick's Sword and Armor will merely put you on an equal footing with them. Red Dragons with their unparalleled strength and agility coupled with their ability to use Sleep magic makes then almost as dangerous as Dragonlord himself.
Though you've found the true path behind the throne, there are plenty of twists and turns ahead. Some stairs will lead you in a deadly circular maze and one set of stairs will endlessly return you to the same room you had just left.
If you are entering the castle to challenge the Dragonlord, be sure you conserve as much MP as possible - you will be relying heavily on your Healmore spell. When the path diverges on level 4, take the left stairs down and it will lead you straight to the lowest part of the castle. At the lowest level of the castle, where the cliff meets the sea, you will find the Dragonmaster's chambers. His treasury can be found from the north path and the path to the left will lead you briefly outside the castle before you come face to face with the Dragonlord himself.
Dragonlord
The Dragonlord has powerful magic and will chant both Stopspell and Hurtmore against you. He will likely resist Sleep and Stopspell so conserve your MP and strike with Erdrick's Sword before he can do too much damage to you.HP: 100 Exp: - GP: -
Dragonlord
Having been defeated, the Dragonlord reveals his true form. With his greatly increased attack and defense, you will need to finish him quickly yet cautiously. Always chant Healmore if your HP drops too low, which will likely be every other round. His deadly fire breath can damage almost half of your total HP and his regular physical attacks are nearly as strong. With a healthy amount of MP you should narrowly be able to outlast his onslaught. Just as with his previous form he will be unaffected by magical attacks so use Erdrick's Sword to save Alefgard once again.HP:130 Exp: - GP: - With the Balls of Light recovered, a brilliant radiance engulfs all of Alefgard, removing all of the evil monsters from the realm. Return to Tantegel Castle where the grateful King Lorik will bestow all of the fanfare that the hero of Alefgard deserves.
Experience Table
Lvl Exp Magic Str Agi HP MP 1 - 4 4 15 0 2 7 1 0 7 0 3 23 Heal 2 2 2 5 4 47 Hurt 0 2 7 11 5 110 5 2 4 4 6 220 4 0 3 4 7 450 Sleep 2 7 2 2 8 800 4 3 6 3 9 1,300 Radiant 8 2 4 7 10 2,000 Stopspell 5 9 4 4 11 2,900 5 4 8 10 12 4,000 Outside 8 5 1 8 13 5,500 Return 4 8 7 6 14 7,500 8 7 8 6 15 10,000 Repel 8 9 8 2
Lvl Exp Magic Str Agi HP MP 16 13,000 4 6 6 23 17 16,000 Healmore 0 8 8 5 18 19,000 13 6 15 8 19 22,000 Hurtmore 2 2 15 7 20 26,000 5 2 8 13 21 30,000 3 2 11 7 22 34,000 2 0 9 11 23 38,000 2 4 7 7 24 42,000 4 4 5 8 25 46,000 10 2 4 0 26 50,000 4 5 6 7 27 54,000 8 2 9 7 28 58,000 5 8 6 5 29 62,000 5 5 5 10 30 65,535 5 10 10 10 On some levels, stat increases are adjusted slightly based on the Hero's name, favoring two stats and hindering the other two.


